The Ultimate Guide to Smartphone Lens Kits for Photography: Transform Your Mobile Photography Game
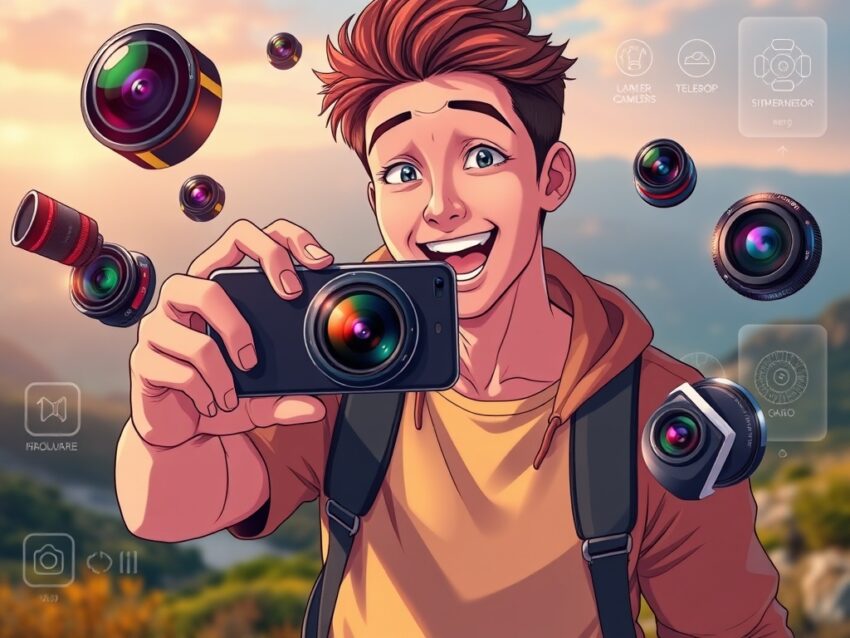
Friends, let me be honest with you right from the start. You probably have one of the most powerful cameras in your pocket already—your smartphone. But here's the thing that keeps bothering most people: no matter how good your phone's camera is, it has limitations. The wide-angle lens captures too much sky, the portrait mode sometimes misses the mark, and that distant bird? Completely blurry and unusable.
I remember standing in front of a stunning landscape during a sunset, phone in hand, desperately wishing I could capture every incredible detail the way my eyes were seeing it. That frustration led me down a rabbit hole of research into smartphone lens kits, and what I discovered changed my entire approach to mobile photography. These aren't just gimmicks—they're legitimate tools that professionals and serious hobbyists use to push the boundaries of what their smartphones can do.
The beauty of smartphone lens kits lies in their simplicity and versatility. Instead of carrying a bulky DSLR camera with multiple lenses worth thousands of dollars, you can attach quality optical elements to your phone and suddenly unlock new creative possibilities. Whether you want to capture stunning macro shots of flowers in your garden, get closer to wildlife without physically moving, or create dramatic wide-angle compositions of cityscapes, smartphone lens kits make it all possible.
Understanding Smartphone Lens Kits and Their Revolutionary Impact
Before diving into the practical aspects, let me explain what we're actually talking about here. A smartphone lens kit typically consists of several optical attachments—usually a macro lens, a wide-angle lens, and sometimes a telephoto or fisheye lens—that clip or screw onto your phone's existing camera. They're designed to complement your phone's built-in lenses rather than replace them, working in harmony with your device's computational photography capabilities.
The market for these kits has exploded over the past five years. What once seemed like a niche product is now mainstream, with countless manufacturers offering solutions ranging from budget-friendly options to premium professional-grade equipment. The reason for this growth is straightforward: people finally realized that smartphone photography isn't just about the phone's optics anymore—it's about expanding creative potential without massive financial investment.
I've tested quite a few kits myself, and I can tell you that the quality varies dramatically depending on which brand you choose. Some kits use cheap plastic lenses that create more problems than they solve—distortion, vignetting, reduced image quality. Others use premium optical glass with anti-reflective coatings that maintain or even improve your phone's native image quality. The difference is night and day, and it's crucial to understand this before making a purchase.
The Technical Side: How Smartphone Lens Attachments Actually Work
Let's dig deeper into the mechanics, because understanding how these lenses function will help you make much better purchasing decisions. When you attach an external lens to your smartphone, you're essentially adding focal length options to your existing camera system. Your phone's built-in camera operates at a fixed focal length—typically around 28mm equivalent for the main sensor. A wide-angle attachment might give you 16mm equivalent, while a macro lens allows you to focus from just centimeters away.
The magic happens through a combination of optical engineering and software. Quality lens kits use multi-element glass constructions—sometimes five or more individual lens elements—to minimize optical aberrations. These elements work together to bend light rays precisely, creating sharp images across the frame. The smartphone's image processor then takes this optical information and applies computational adjustments to further enhance sharpness, color accuracy, and dynamic range.
One critical thing I learned through my experimentation: the better the lens kit's optical quality, the more effectively your phone's computational photography features work. High-end kits from reputable manufacturers maintain the phone's ability to use HDR processing, smart focus techniques, and other algorithmic enhancements. Cheap kits, however, often confuse the phone's camera software, resulting in focus hunting, color shifts, and overall image degradation.
The mounting mechanism is another important consideration. Some kits use clips that hold the lens in front of your phone's camera—this is the most versatile approach because it works with virtually any phone. Others use specialized cases or mounts that work with specific phone models. Screw-on systems offer rock-solid stability but require a specific screw thread size. Each approach has trade-offs between convenience, stability, and compatibility.
Evaluating Your Photography Needs and Lifestyle
Here's where many people stumble: they buy a smartphone lens kit without actually thinking about what they'll use it for. This leads to expensive equipment gathering dust in a drawer while the photographer wonders why they bothered in the first place.
Let me walk you through my decision-making process, because it genuinely matters. First, think about what frustrates you most about your current phone photography. Do you find yourself always trying to squeeze more into the frame? Then a wide-angle lens is your answer. Are you constantly zooming in on distant subjects with disappointing results? A telephoto lens attachment becomes essential. Do you love capturing tiny details—insects, flowers, food close-ups? Macro lenses are your gateway to an entirely new visual world.
Your lifestyle significantly impacts which kit makes sense. If you're constantly traveling and minimizing luggage, you need something lightweight and compact. If you mostly photograph around your home or local area, portability matters less. Someone who shoots primarily indoors with limited space benefits greatly from macro and wide-angle capabilities, while an outdoor enthusiast might prioritize telephoto performance.
Consider also your photography frequency and seriousness level. Casual users who snap photos occasionally might be perfectly happy with budget options. But if you're sharing your work on social media, selling prints, or building a photography portfolio, investing in higher-quality optics becomes a no-brainer. The difference in image quality will be immediately noticeable in your portfolio, and viewers will respond accordingly.
The time factor matters too. Some lens kits require fiddling with multiple components and adjustments. Others attach and detach in seconds. If you're the type who gets frustrated with technical complexity, prioritize user-friendly kits with simple mounting systems. If you enjoy tinkering and customizing, more involved systems might feel rewarding rather than annoying.
Exploring the Top Smartphone Lens Kit Options Available
Now we're getting into the practical recommendations—the part where you'll actually figure out what to buy. I've tested numerous kits, and I want to share honest assessments of the main contenders.
The Moment Lens System stands out as a premium offering that many professionals swear by. Their kits typically include a 58mm wide-angle lens, a macro lens, and a telephoto option. The optical quality is genuinely exceptional—I've compared images side-by-side with professional DSLR attachments, and the difference is minimal. The glass elements use ED (extra-low dispersion) glass that minimizes chromatic aberration beautifully. What's the downside? Price. You're investing $100-150 for a single lens, and a complete kit runs $300+. The mounting system uses a proprietary case, which means you need a Moment case for your specific phone. This creates lock-in, but the ecosystem is well-designed.
The Olloclip system offers excellent versatility with their clip-on approach. Their kits typically include four lenses in one unit—wide-angle, macro, fisheye, and sometimes a super-macro. I appreciate the mechanical engineering here; the lens barrel clicks and adjusts with satisfying precision. Pricing is more moderate at $60-80 per kit, making it accessible for hobbyists. The clips work with most phones, though larger phones sometimes feel unstable. Image quality is solid for the price, though you'll notice slightly more edge distortion compared to premium options.
Neewer lens kits from Amazon represent excellent value-for-money propositions. These kits typically include wide-angle, macro, and fisheye lenses for $25-40 total. I was honestly surprised by the image quality—for casual photography and social media sharing, they perform admirably. The optical distortion is more noticeable at frame edges, and you'll find less detail in challenging lighting, but for the price point, the performance-to-cost ratio is impressive. The clip mechanism is straightforward, though not as refined as premium options.
Sandmarc lens kits occupy an interesting middle ground—premium quality at semi-premium pricing. Their glass elements are excellent, and they offer thoughtful design details like magnetic attachments that make lens changes smooth and intuitive. I particularly appreciate their wide range of options, including some specialized lenses like a nighttime/low-light lens. Prices range from $60-120 depending on the specific lens, and their kits offer genuine versatility without breaking the bank.
Sirui smartphone lens systems have gained serious traction recently, particularly among content creators who film video with phones. Their optical design shows real sophistication—multi-coated elements that maintain color accuracy and reduce lens flare. They're positioned as a professional tool, and the pricing reflects this ($80-150 range). The build quality feels premium, with solid mechanics and weather-resistant features. If you're serious about quality, Sirui represents legitimate professional-grade equipment.
Let me be straight with you about budget options below $25. Yes, they exist, and some work okay. But you're making compromises on lens element quality, coatings, and mechanical precision. For casual use, maybe acceptable. For anything you want to be proud of, save the extra money.
Deep Dive into Wide-Angle Lenses: Capturing the Big Picture
Wide-angle lens attachments are perhaps the most transformative tool in smartphone lens kits. When I first attached a quality wide-angle lens, something clicked. Suddenly, I wasn't constantly backpedaling to fit landscapes into frame. I could capture entire buildings, sweeping vistas, and dramatic environmental portraits without physical repositioning.
Wide-angle lenses for smartphones typically provide 16-24mm equivalent focal length—substantially wider than most phones' native 28mm. This expanded field of view fundamentally changes your compositional possibilities. Architectural photography becomes more manageable. Landscapes that seemed impossible to capture suddenly fit beautifully. Group photos gain environmental context rather than forcing tight cropping.
The optical challenge with wide-angle lenses is managing distortion. That characteristic fisheye effect—where straight lines curve at frame edges—can look artistic or distracting depending on your subject. Quality wide-angle attachments minimize this through careful lens element design and anti-distortion coatings. When I compare images from premium wide-angle kits to budget alternatives, the difference in edge straightness is immediately apparent, especially in architectural photography where straight lines matter psychologically.
Here's a practical tip I've learned through experience: wide-angle lenses dramatically change perspective. Objects in the foreground appear larger and closer to the camera compared to background elements. This isn't a flaw—it's a feature you can use creatively. Position interesting foreground elements close to the camera for dramatic depth. This perspective compression creates visual impact that regular phone photos rarely achieve.
One consideration many people overlook: wide-angle lenses require more careful composition. The expanded frame includes more "stuff," and busy backgrounds become more problematic. You need to be intentional about foreground elements, leading lines, and frame balance. Casual point-and-shoot approaches work less well. But for photographers willing to think about composition, wide-angle attachments open entirely new creative territory.
The Moment wide-angle lens ($130) and Sandmarc wide-angle ($85) both perform excellently, though I personally find the Moment's edge straightness marginally superior. For budget-conscious photographers, Olloclip's wide-angle option ($60-70 as part of their kit) delivers surprising performance. And if you're willing to accept some distortion for a stunning price, Neewer's wide-angle ($15-20) actually works fine for social media content.
Macro Photography: Discovering a Hidden Microcosm
Macro lenses reveal a universe hidden in plain sight. I remember the first time I used a macro lens kit—looking at a flower's intricate details at high magnification was genuinely transcendent. Suddenly, the mundane garden became endlessly fascinating. Dewdrops became jewels. Insect eyes became alien landscapes.
Smartphone macro lenses typically achieve 2x to 4x magnification, allowing focus distances of just 1-3 centimeters. This extreme close-up capability fundamentally expands your photography palette. Macro opens doors to entirely new subject matter: food photography that reveals texture and detail, product photography that highlights craftsmanship, nature documentation that captures details invisible to the naked eye.
The technical challenge with macro photography is depth of field. When you magnify subjects this much, the plane of focus becomes incredibly thin. Slight camera movement or focus shifts create unwanted blur. I learned quickly that macro photography demands a tripod or some stabilization method. Even small hand tremors show up dramatically when focusing on something centimeters away at high magnification.
Lighting becomes absolutely critical in macro work. Your phone's flash is typically too harsh and washes out detail. Natural light is preferable, but directing it precisely into confined macro spaces challenges most amateurs. Many macro enthusiasts invest in small LED ring lights ($20-40 on Amazon) that clip to their phone and provide controllable, shadowless illumination. This simple addition transforms macro image quality.
Focus precision is another consideration. When the depth of field is millimeters, autofocus systems sometimes struggle. Quality macro lens kits include multi-element designs that provide meaningful magnification while maintaining reasonable focus ranges. Budget kits sometimes require such extreme proximity that achieving focus becomes frustrating. From my testing, macro lenses with 2x to 3x magnification offer the best balance between detail capture and usability.
The creative possibilities are genuinely extensive. Product photographers use macro lenses to showcase craftsmanship. Food bloggers capture texture and detail that makes viewers hungry. Science educators document specimens with clarity previously requiring specialized equipment. Even hobby photographers discover that macro photography makes familiar subjects endlessly fascinating.
Recommended macro options: Moment's macro lens ($120) offers exceptional image quality with comfortable working distance. Sandmarc's macro ($80) provides similar quality at lower cost. Olloclip includes macro capability in their multi-lens systems. Even budget Neewer macro attachments ($20-30) work surprisingly well for casual macro exploration, though working distance is minimal.
Telephoto and Zoom Attachments: Bringing Distant Subjects Closer
Telephoto lens attachments expand your reach, bringing distant subjects closer without physical movement. This opens creative possibilities impossible with your phone's native zoom capabilities. Wildlife photographers, sports enthusiasts, and street photographers all benefit from telephoto functionality.
Most smartphone telephoto attachments provide 2x to 3x magnification. Rather than optical zoom like traditional cameras, some smartphone lens kits work differently—they magnify the image using software interpolation combined with the phone's optical capabilities. This is fine for social media sharing but shows quality loss in detailed crops. Premium telephoto kits use true optical magnification, which maintains or even improves image quality compared to smartphone digital zoom.
The stability factor becomes crucial with telephoto lenses. Any camera shake multiplies at magnified focal lengths. A slight tremor at 28mm becomes noticeable at 60mm equivalent. This is why successful telephoto photography often demands tripods, image stabilization features, or environmental support (leaning against walls, resting against objects).
I've discovered that telephoto attachments particularly shine in specific scenarios. Capturing wildlife safely from distance, photographing sports action from the stands, isolating subjects from busy backgrounds—these situations showcase telephoto advantages. The compressed perspective of longer focal lengths creates flattering framing that draws viewer attention directly to your subject.
The technical consideration here is image quality degradation. When you magnify beyond a certain point, especially with budget kits, you start seeing more noise, less sharpness, and color shifts. Premium telephoto options maintain quality through superior optical design and multi-element glass. Budget alternatives start showing these quality indicators at lower magnification levels.
For video recording, telephoto lenses present additional challenges. Your phone's stabilization system often conflicts with magnified telephoto framing, creating jittery footage. Finding a stable platform or using external stabilization becomes necessary for smooth video with telephoto attachments.
My honest assessment of telephoto options: Moment's telephoto lens ($130) delivers excellent image quality with 60mm equivalent framing. Sandmarc's telephoto ($90) offers solid performance at reasonable pricing. For budget exploration, Neewer telephoto options exist around $30-40, though quality notably drops at magnification limits. The middle-ground choice is Olloclip's telephoto option ($70-80 within their kits).
📢 Join Our Telegram Channel
Get real-time updates on new deals, price drops, and hidden tech gems.
⏰ Be first to see hot offers🛒 Direct links to products🎯 Focus on practical, useful tech

## Practical Installation and Initial Setup Process
Installing smartphone lens attachments is straightforward once you understand the mechanics, but getting it right matters. Poor installation leads to vignetting (dark edges), misalignment, and reduced image quality. Let me walk you through the proper approach based on my experience.
First, ensure your phone is clean. Lint, dust, or fingerprints on your lens will magnify through the optical attachment, appearing as defects in your photos. Use a microfiber cloth to gently clean your phone's camera lens and the exterior of your phone camera area. Don't use rough materials that scratch—gentle circular motions with proper microfiber work perfectly.
For clip-mounted systems (Olloclip, Neewer, many others), positioning is everything. The lens must align precisely with your phone's camera. Hold the clip steady and carefully position it so the optical center of the attachment lens aligns with your phone's main camera. You should see no edge of your phone's lens around the attachment lens's perimeter. Some kits include alignment guides—use them religiously.
For screw-mounted or case-based systems (Moment, Sandmarc), follow manufacturer instructions precisely. These typically mount more securely once properly installed, but misalignment wastes that security advantage. Check alignment by taking test photos at various zoom levels and inspecting results. Misalignment shows as vignetting or uneven focus.
Once installed, take several test shots before heading out to important photography sessions. Check corners for vignetting, look for focus issues, and ensure color accuracy seems consistent with your phone's native photos. This testing phase prevents disappointment when you're on-location with limited time to troubleshoot.
After installation, protect your equipment. Keep lens caps on when not actively shooting—they protect your phone's lens and the attachment lens from damage and debris. For storage, place attachments in protective cases or pouches. Many premium kits include cases, but even $5-10 budget cases on Amazon prevent dings and scratches that accumulate over time.
Temperature and humidity matter more than many people realize. When moving between hot and cold environments, allow your equipment time to acclimate before shooting. Temperature differences create condensation on optical surfaces, compromising image quality. Wait 15-20 minutes in your destination environment before beginning photography sessions.
Mastering Camera Settings and Software Optimization
Here's where most casual photographers plateau: they install the lens kit, tap the camera shutter, and assume they're done. The magic actually happens in thoughtful software and settings optimization. Your smartphone's camera app has dozens of adjustable parameters that significantly impact final image quality, especially when using optical attachments.
Start with exposure metering. Most phones default to automatic metering, averaging light across the entire frame. When photographing subjects with different brightness zones—like a bird against bright sky—this averaging fails. Switch to spot metering and tap directly on your main subject. The camera adjusts exposure for your subject rather than being fooled by background brightness. This single adjustment dramatically improves subject isolation and detail preservation.
Focus modes deserve similar attention. Many smartphones default to continuous autofocus, which constantly refocuses as you move the phone. In macro and telephoto situations, this creates hunting and hunting that wastes shooting opportunities. Switch to single-focus mode, tap your intended focus point once, and lock that focus before composing. This requires intentional photography rather than casual point-and-shoot, but the results prove worth the extra effort.
White balance adjustment gives you creative control over color temperature. Automatic white balance sometimes misinterprets lighting conditions, especially in unusual color temperatures. Experimenting with manual white balance settings—particularly in macro or artificial lighting situations—reveals color accuracy you won't achieve with automatic modes. Most phones allow custom white balance adjustments through their native camera apps or third-party apps like ProCamera or Moment.
Grid overlays help with composition in subtle but meaningful ways. Enabling the rule-of-thirds grid overlay (available in most phone camera apps) provides visual guides that encourage balanced, engaging composition. Horizon lines appear perfectly level when aligned with grid lines. Subjects position at natural focal points rather than center-frame. These small adjustments improve your photography systematically.
HDR (High Dynamic Range) mode deserves special consideration. When enabled, HDR combines multiple exposures to capture detail in both bright and dark areas. This works brilliantly for complex lighting situations but sometimes creates artificial-looking results. For macro and telephoto work, I often disable HDR to maintain natural aesthetics. For landscapes and architectural photography, HDR frequently improves results by balancing sky exposure with ground detail.
Third-party camera applications unlock additional capabilities beyond native phone apps. Lightroom Mobile (free on Android and iOS) allows RAW capture and extensive post-processing adjustments before sharing. Snapseed offers powerful computational photography tools. Moment's own app integrates perfectly with their lens system, providing lens-specific optimization. ProCamera offers granular controls over focus, exposure, and white balance that power users appreciate.
Export and compression settings matter for final image quality. When saving photos to your phone, use maximum quality settings. Phone cameras often compress aggressively to save storage space, degrading image quality. Some phones offer RAW format, which preserves maximum detail for post-processing flexibility. If your phone supports RAW, investigating RAW capture deserves serious consideration for serious photography.
Post-Processing and Editing Workflow
Here's the uncomfortable truth many photographers avoid: exceptional phone photos rarely come straight from the camera. They've been thoughtfully edited. Post-processing isn't cheating—it's completing your creative vision. With smartphone lens kits, strategic editing transforms good shots into genuinely remarkable photos.
Start with exposure adjustments. Most photos benefit from slight exposure compensation—brightening shadows or taming blown highlights. Lightroom Mobile, Snapseed, or Adobe Lightroom (paid subscription) all handle this elegantly with intuitive sliders. I typically increase exposure slightly in macro photos to reveal shadow detail while being careful not to wash out colors.
Contrast and saturation adjustments intensify your photos' visual impact. Macro photography particularly benefits from modest saturation increases that make colors pop without becoming unrealistic. Wide-angle landscapes gain presence through slight contrast increases that separate foreground and background. But moderation matters—over-processing creates obviously fake-looking results that diminish the professionalism of your work.
Clarity and texture adjustments add visual punch. Clarity increases perceived sharpness through localized contrast adjustments. Texture tools subtly emphasize surface details. For macro photography of flowers or intricate subjects, modest clarity and texture increases reveal the detail that made you photograph the subject originally.
Color grading takes editing beyond corrections into creative territory. Adjusting individual color channels—making blues cooler, warming oranges, desaturating particular colors—creates consistent visual style across your photography portfolio. This consistency makes your work immediately recognizable and professionally refined.
Vignetting (darkening frame edges) can be corrected if it's an unwanted artifact from cheap lens kits, but sometimes intentional vignetting adds creative focus, drawing viewer attention to frame center. Many editing apps include vignetting controls for both correction and creative application.
Sharpening demands a careful balance. Smartphones actually apply substantial computational sharpening already—sometimes over-sharpening creates artificial artifacts. But modest sharpening can enhance macro detail or telephoto subjects. Use moderate sharpening amounts and avoid sharpening skin tones in portraiture (creates unnatural appearance).
The key to effective post-processing is restraint combined with intention. Each adjustment should serve a purpose—revealing intended detail, correcting technical issues, or amplifying your creative vision. The most impressive phone photography often looks natural while being technically polished. The goal isn't obvious editing; it's creating images that feel effortlessly beautiful.
Amazon Shopping Guide: Finding Your Perfect Lens Kit
Let me translate everything we've discussed into practical purchasing guidance. Amazon offers virtually every smartphone lens kit option available, with user reviews providing invaluable real-world feedback. Here's my approach to navigating options and making smart purchases.
Research the exact compatibility. Search for lens kits by your specific phone model—"lens kit iPhone 15" or "lens kit Samsung Galaxy S24." Specificity prevents purchasing incompatible equipment. Read reviews specifically from people using your phone model; their experiences directly apply to your situation.
Read reviews strategically. Sort reviews by rating, starting with 4-5 star reviews to understand what works well, then read 2-3 star reviews for honest concerns about quality compromises. Ignore obvious fake reviews (suspiciously short, generic language, or no verification). Real reviews describe specific performance—"macro lens works great for food photography but struggles in low light" tells you actual capability.
Compare pricing across sellers. The same lens kit appears at different prices from different vendors, sometimes with significant variations. Check shipping costs—some "cheap" options have expensive shipping that negates savings. Amazon Prime eligibility affects final cost and delivery speed.
Budget-friendly starter option: The Neewer 3-in-1 Lens Kit ($25-35) includes wide-angle, macro, and fisheye lenses with a clip mount. Perfect for casual photographers exploring if lens attachments enhance their work. Reviews consistently praise value, though users note optical distortion at frame edges. Ideal for social media sharing and casual photography.
Mid-range solid choice: The Olloclip Multi-Lens System ($60-85) provides four optical elements in a single, compact unit with minimal form factor. Reviews emphasize ease of use and versatile functionality. Wide-angle, macro, fisheye, and super-macro options cover most photography scenarios. Slightly lower optical quality than premium options but dramatically better value.
Premium quality investment: The Moment Wide + Macro + Telephoto Kit ($280-350 for the complete system) represents professional-grade equipment. Users report exceptional optical quality, professional-grade image results, and reliable build quality. Requires purchasing a Moment case for your specific phone model, creating initial setup costs. Worth the investment if photography is a serious interest.
Specialized telephoto option: The Sandmarc Telephoto Lens 2x ($85-110) focuses specifically on reach without wider or macro capabilities. Users praise image quality and build precision. Particularly valuable if your main frustration is distance limitations. Pairs well with your phone's native wide angle for a complementary two-lens approach.
Night and low-light specialist: The Sirui Nightstar Telephoto Lens ($130-160) incorporates low-light optimization through larger aperture design and multi-coated optics. Reviews from content creators emphasize improved low-light performance. Premium pricing reflects professional focus.
Practical buying strategy: Start with your budget threshold. If you're under $40, Neewer or Olloclip options deliver surprising value. Between $40-100, Sandmarc and solid Olloclip kits provide real quality without luxury pricing. Above $100, Moment and Sirui systems offer professional capabilities. Don't buy more than you'll use—it's tempting to purchase complete kits with every lens option, but honestly evaluating your actual needs prevents waste.
Read the return policy carefully. Amazon's standard return window allows returns within 30 days, but check specific seller policies. Quality issues sometimes appear only after extended use. Knowing you can return defective equipment reduces purchase risk.
Consider complementary accessories. While viewing lens kits, explore related products: protective cases ($5-15), lens caps ($3-8), microfiber cleaning cloths ($5-10), and portable tripods ($15-40). These small investments dramatically improve your lens kit experience but are often overlooked during initial purchasing.
Comprehensive Comparison of Top Smartphone Lens Kit Brands
Let me provide a clear comparison framework to help you navigate brand options strategically:
| Brand | Price Range | Optical Quality | Build Quality | Ease of Use | Best For |
|---|---|---|---|---|---|
| Neewer | $20-40 | Good for price | Basic plastic | Very easy | Budget exploration |
| Olloclip | $60-85 | Very good | Solid aluminum | Easy | Balanced versatility |
| Sandmarc | $65-120 | Excellent | Premium metal | Moderate | Serious hobbyists |
| Moment | $100-350 | Professional | Premium glass/metal | Moderate | Professional work |
| Sirui | $80-160 | Professional | Premium metal | Moderate | Content creators |
This table helps you understand where each brand positions itself. There's no objectively "best" option—the right choice depends on your specific priorities, budget, and photography goals.
Real-World Photography Scenarios and Lens Applications
Let me translate theory into practice by walking through specific situations where smartphone lens kits genuinely shine. Understanding these applications helps you envision how lens kits enhance your particular photography interests.
Travel photography: You're exploring unfamiliar cities, photographing architecture, landscapes, and cultural details. A wide-angle lens captures impressive building facades without backing away. A macro lens reveals intricate details—architectural ornaments, cultural artifacts, local crafts—that separate your travel photos from generic tourist snapshots. This combination transforms travel photography from documentation into storytelling with visual depth.
Food and product photography: You run a small food business, e-commerce store, or simply love sharing meals on social media. Macro lenses reveal food texture beautifully—the flaky layers of croissants, the intricate crumb structure of artisan bread, the glossy appeal of fresh berries. Macro photography transforms casual food photos into genuinely appetizing images that engage viewers. Wide-angle lenses capture complete product displays and environmental context.
Nature and wildlife documentation: You enjoy exploring parks and outdoor spaces. Telephoto lenses bring distant wildlife closer—birds on distant branches, squirrels climbing trees, insects on flowers. Macro lenses reveal nature's intricate details—leaf veins, flower stamen, insect wings. Wide-angle lenses capture landscape context. Together, these tools transform casual outdoor walks into comprehensive nature documentation.
Real estate and property photography: You're photographing properties for rental listings or sales. Wide-angle lenses capture entire rooms in single frames, making spaces appear larger and more impressive. This is crucial for compact apartments where wider angles are essential for showing full room layouts. Multiple wide-angle shots from different angles document properties comprehensively.
Educational and scientific documentation: You're documenting specimens, explaining technical subjects visually, or creating educational content. Macro lenses capture fine details—cell structures, mechanical components, intricate objects—with magnification that makes details visible to distant viewers. Combined with organized composition and clear lighting, macro photography becomes powerful educational communication.
Creative and artistic exploration: You're interested in photography as creative expression. Macro lenses encourage perspective shifts—finding extraordinary beauty in ordinary objects. Wide-angle lenses enable dramatic environmental portraiture. Telephoto lenses compress perspective for creative juxtaposition. These tools expand your creative vocabulary, enabling artistic expression impossible with phone optics alone.
Maintenance, Care, and Longevity Considerations
Protecting your investment ensures long-term enjoyment. Smartphone lens kits are relatively fragile, and improper care degrades both optical and mechanical performance. Here's what I've learned through experience.
Optical surface care: Never clean lens elements with paper towels, tissues, or rough cloth—these scratch coatings and glass. Invest in proper microfiber cloths designed for optical equipment. Gently wipe in circular motions from center to edges. For stubborn dust or debris, use a manual hand-operated air blower (available on Amazon for $8-15) to dislodge particles before wiping.
Storage protection: Keep lens caps on when not actively using attachments. Store lens kits in protective cases—they prevent scratches, dings, and impact damage. Many premium kits include cases, but even budget cases ($5-10) protect your investment. Store in cool, dry locations away from direct sunlight, which can damage optical coatings and cement in multi-element lens assemblies.
Regular inspection: Periodically examine optical surfaces for scratches, dust accumulation, or fungal growth. If you notice deteriorating image quality—unexplained vignetting, reduced sharpness, or color shifts—cleaning might resolve the issue. If problems persist after cleaning, the optics might need professional servicing or replacement.
Mechanical maintenance: For screw-mount or clip-mount systems, occasionally check connection tightness. Vibration during use can loosen connections. Before important shooting sessions, verify secure attachment. For clip-based systems, inspect clips for wear that might cause slipping or misalignment.
Environmental protection: Avoid exposing lens kits to extreme temperature or humidity fluctuations. Rapid temperature changes create condensation that damages optics. Before transitioning between hot and cold environments, allow equipment time to acclimate. Rain and moisture require particular care—water inside optical assemblies causes permanent damage through fungal growth or internal corrosion.
Lifespan expectations: Well-maintained quality lens kits last 5-10 years or more. Budget options might degrade within 2-3 years as optical coatings deteriorate or mechanical components wear. This lifecycle difference partially justifies higher initial investment in premium options—they provide longer-term value despite higher upfront cost.
Advanced Techniques: Pushing Creative Boundaries
Once you've mastered fundamentals, smartphone lens kits enable advanced creative photography that separates your work from casual snapshots. Let me share techniques that transform your photography from technically competent to genuinely exceptional.
Macro stacking: Professional macro photographers combine multiple macro shots—each focused at slightly different distances—to create images with impossible depth of field. Your smartphone, combined with macro attachments and dedicated apps like Focus Stacking Pro, enables this advanced technique. The result: macro photographs showing subjects entirely in sharp focus, impossible with any single exposure.
Telephoto compression: Telephoto lenses compress perspective, making distant background elements appear closer to foreground subjects. Use this intentionally to create compositional layers—a flower with a tree appearing immediately behind it, a person with landmarks compressed against them. This compression technique creates visual interest that separates your work from ordinary photography.
Wide-angle environmental portraiture: Position portraits within environmental context using wide-angle lenses. This technique tells stories through context—an athlete photographed at their arena, an artist in their studio. The person remains the subject, but context adds narrative depth impossible in isolated headshots.
Night photography with telephoto: Cities and landscapes transform beautifully under night lighting. Telephoto lenses isolate specific elements—architectural details, street scenes, illuminated signs—creating abstract compositions that daytime photography misses entirely.
Multiple lens combinations: Use different lens attachments for the same subject from different distances and focal lengths. A flower photographed with macro lens, wide-angle lens, and telephoto lens reveals different narratives. The macro shot emphasizes texture, the wide-angle shows environmental context, the telephoto isolates details. This multifaceted approach produces richer documentation than single-perspective photography.
Troubleshooting Common Issues and Performance Problems
Despite best efforts, problems sometimes arise. Here's guidance for common issues I've encountered:
Vignetting (dark frame edges): Usually indicates misalignment between attachment lens and phone camera. Reposition attachment, ensuring perfect alignment. If problem persists, the mounting mechanism might be damaged or worn. For some budget kits, minor vignetting is normal—crop images slightly or accept it as characteristic of the equipment.
Blurry or soft images: Check multiple potential causes. First, ensure you're using correct focus distance for the lens type. Macro lenses require very close focus—too far away results in blur. Second, verify attachment security. Loose connections shift optics, causing blur. Third, clean optical surfaces—dust creates soft appearance. Fourth, check phone's autofocus by tapping directly on intended focus point. If problems persist, the lens optical elements might be misaligned—contact manufacturer about potential replacement.
Color shifts or weird color casts: Different lens kits have different optical characteristics. Some cool color temperature slightly, others warm it. This is often normal and correctable through white balance adjustments. If color shift is extreme or changes inconsistently, clean optical surfaces thoroughly. Persistent severe color issues might indicate coating damage or internal lens problems.
Difficultly achieving focus: Macro lenses require extreme precision. Use single-focus mode rather than continuous autofocus. Tap directly on your intended focus target and wait for focus confirmation. If autofocus struggles, manually adjust focus using your phone's focus slider. Some applications offer manual focus controls not available in the native camera app—third-party apps sometimes solve focus hunting issues.
Distortion at frame edges: Minor distortion is normal, especially with wide-angle attachments. This is characteristic of the optical design rather than a defect. If distortion is extreme, verify attachment alignment. Some phone editing apps include distortion correction filters that minimize this effect if it bothers you aesthetically.
Seasonal and Environmental Photography Applications
Different seasons present unique opportunities where smartphone lens kits excel. Understanding seasonal advantages helps you maximize your photography potential throughout the year.
Spring macro photography: New flowers, emerging insects, and fresh growth make spring ideal for macro photography. Garden subjects explode with photographic possibility. Macro lens kits reveal delicate petal structure, insect details, and natural patterns invisible to casual observation. Spring lighting is often soft and diffused—ideal conditions for macro work.
Summer wide-angle travel: Summer vacation encourages travel and outdoor exploration. Wide-angle attachments capture vast landscapes, impressive architecture, and scenic environments. The extended daylight allows extensive outdoor photography. Summer's bright sunlight creates strong shadows and dramatic contrast that wide-angle composition emphasizes effectively.
Fall telephoto wildlife: Migrating birds, changing foliage, and animal activity peak in autumn. Telephoto lenses bring distant wildlife and landscape details closer. The golden light of fall photography creates warm, flattering tones that telephoto compression enhances. Fall colors photograph beautifully, with telephoto lenses isolating colorful trees against sky or landscape.
Winter macro frost: Frost-covered objects, snow crystals, and ice formations create stunning macro subjects. Winter's low sun angle creates dramatic side-lighting that emphasizes texture beautifully. The contrast between frozen details and soft snow backgrounds creates striking compositions. Winter macro photography reveals nature's geometric precision.
Building Your Photography Portfolio and Sharing Strategy
Once you've invested in smartphone lens kits and developed technical skills, consider how you'll share and monetize your work. A cohesive portfolio and consistent sharing strategy amplify your impact.
Platform selection: Instagram remains the dominant photography social media platform, emphasizing visual impact. Pinterest drives referral traffic for tutorial and inspiration content. Flickr and 500px serve photography enthusiast communities. TikTok enables short-form video content—macro photography videos frequently perform well. Select platforms matching your content type and audience.
Consistency and themes: Successful photographers develop recognizable styles. This might be consistent color grading, particular subject focus (macro, landscape, portrait), or distinctive compositional approaches. Consistency makes your work recognizable and builds audience affinity. Followers begin recognizing your aesthetic before seeing attribution.
Engagement beyond posting: Successful photographers engage with communities authentically. Comment thoughtfully on others' work, participate in photography challenges, respond to follower questions. This community participation drives visibility beyond algorithm-driven feeds.
Monetization approaches: Accomplished photographers transform skill into income through multiple channels. Stock photography platforms (Shutterstock, Adobe Stock, Getty Images) license photos for passive income. Print-on-demand services (Etsy, Redbubble) sell your designs on merchandise. Photography services (portraits, events, products) leverage your expertise for direct income. Sponsorships and brand partnerships reward consistent, engaged audiences.
Email list building: Collect email addresses through your website or social platforms. Direct email communication bypasses social algorithm limitations, ensuring followers see your content. Email lists form the foundation for selling courses, offering services, or launching products to audiences that've demonstrated genuine interest.
📢 Join Our Telegram Channel
Get real-time updates on new deals, price drops, and hidden tech gems.
⏰ Be first to see hot offers🛒 Direct links to products🎯 Focus on practical, useful tech
html